 |
| Dog Star Griptape Art by TET |
Mostly because you just have to go for it and draw the design freehand, with paint pens, directly onto the griptape. You can make the odd mistake here or there but if you get the proportions of the design completely wrong, it can be very difficult to fix. Often you just have to live with the mistake.
To address the problem I've come up with an easy way anyone can transfer a line art design to their griptape, removing almost all the anxiety of getting the proportions wrong. In fact, you could do this with any line art design, even if you have no drawing skill at all.
Watch the video below to see my technique in action and/or skip past the video where I highlight the basic steps to get your designs onto your griptape the easy way.
How to Transfer Any Line Art to Your Griptape
 |
| Step 1 - Print Design. |
Print your design onto printer paper preferably with lighter grey lines rather than full black lines so you'll be able to clearly see which lines you've already traced.
 |
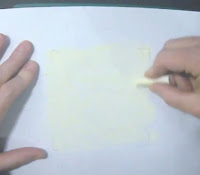
| Step 2 - Coat reverse with chalk. |
Turn your design over and color over the back with regular blackboard chalk. If your design will be on black griptape then white or yellow chalk is best. Make sure the chalk layer is quite thick.
 |
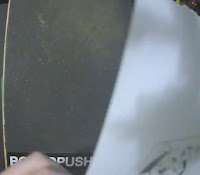
| Step 3 - Place on Griptape. |
Turn the page over so the design is facing you and position on your skateboard griptape. Try not to slide the back of the design around on the griptape otherwise you'll scrape off the chalk. Tape one edge of the design down so the paper won't move but so you can lift it up to check how the transfer of chalk is going.
 |
| Step 4 - Trace with ballpoint pen. |
Hold the page firm with one hand and trace over the design with a ballpoint pen with the other. Press the pen firmly enough to push the chalk into the griptape but not so firm that you start to rip the paper. Draw over each line multiple times, even making the lines thicker to make sure you'll be able to see the chalk outlines on the griptape.
 |
| Step 5 - Periodically check design. |
Periodically lift up the paper to see how the transfer is going underneath. Retrace any lines that are not yet clear. IMPORTANT: Before lifting up the page be sure to hold it firm at one point with your other hand so the design does not move and become out of alignment when you put the page down again and resume tracing.
 |
| Step 6 - Remove Paper Design. |
When the design is completely traced and you can see it reasonably clearly on the griptape remove the paper. At this point it is very easy to smudge the chalk so be very careful not to rest your hand on it or brush over it.
 |
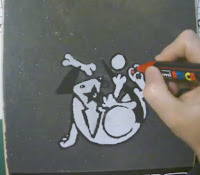
| Step 7 - Trace with Paint Pen. |
Trace the chalk outline on your board with paint pen. I used black for my whole image but use whatever color(s) suit your design. Again, be very careful not to rest your hand on the chalk outlines as you trace them.
 |
| Step 8 - Complete Design. |
Once the chalk outlines have been safely traced you're ready to color in and complete the design.
---o ---o--- o---
If you try this technique let me know how you go in the comments below or in the comment section of my Youtube video above. I'm interested to hear if you found it easy enough to do or if you ran into any problems I haven't anticipated.
Feel free to share links to your finished griptape designs in the comment section below too. I'd love to see them.

Comments
Post a Comment
Comments are moderated by an actual human (me, TET) and may not publish right away. I do read all comments and only reject those not directly related to the post or are spam/scams (I'm looking at you Illuminati recruiters... I mean scammers. Stop commenting on my Illuminati post!).